
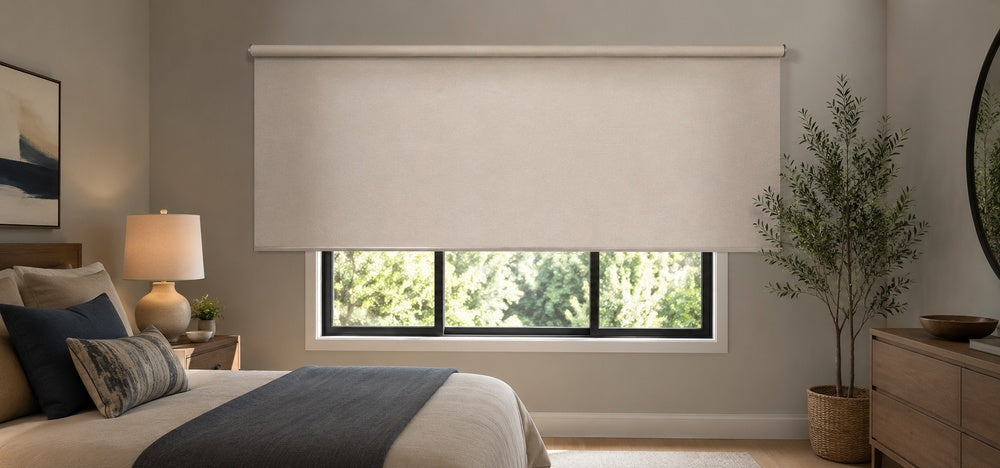

Side gaps that still leak light after blackout shades are fully closed, frames too shallow for an inside mount roller head, or cracked frames you'd rather not fully replace — if any of these sound familiar, the issue usually isn't the shade itself but the mounting method.
Inside mount is constrained by the window frame, so structural side gaps and limited depth are hard to avoid.
Outside mount shifts the brackets onto the wall outside the frame, with the shade extending wider than the window, which structurally bypasses these issues.
This guide walks through outside mount installation and product selection, covering measurement essentials, installation steps, and shade types best suited to different window scenarios.

Outside Mount Blinds: When It Works Better Than Inside Mount
Outside mount isn't always the better option, but in the following scenarios, the structural advantages usually stand out:
Rooms with high blackout needs: Bedrooms, home theaters, and nurseries paired with outside mount blackout roller shades or blackout cellular shades noticeably reduce side light bleed.
Shallow window frames: Older apartments, viny
l windows, or windows with security bars often can't fit a motor tube inside mount — outside is essentially the default.
Visible frame imperfections: Cracked wall joints, peeling paint, or moldy caulking can be covered by outside mount shades, which is far less effort than a full renovation.
Windows with handles or locks: Protruding hardware on casement or awning windows disrupts inside mount shade travel; outside mount runs the shade fully outside the window to bypass these obstructions.
Rental properties where frame damage isn't allowed: Outside mount moves the fixing points to the wall or trim, making it easier to restore on move-out.
Visually enlarging the window: Outside mount coverage extends beyond the window itself, creating a wider or taller visual effect — common in living rooms and dining rooms. See 7 large window treatment ideas.

Measurement Essentials Before Outside Mount Installation
Outside mount measurement logic differs from inside mount — you're measuring the area you want to cover, not the inside dimensions of the window frame. Four key variables to confirm:
1. Width
Each side should extend slightly beyond the window frame's outer edge so the shade covers the frame edges.
Whether the two-side allowance is symmetrical and whether the wall has enough extension space both need to be confirmed before ordering — specific allowances vary by product, so refer to the SmartWings official measurement guide or contact customer service to confirm.
2. Height
Brackets sit above the top of the window frame, leaving room for the valance.
To further reduce top light bleed, raise the bracket position slightly so the closed shade extends above the frame top. Also check the wall-to-ceiling clearance in advance to make sure there's enough space.
3. Length
The bottom should extend flush with the windowsill or slightly below it. In blackout scenarios, extra length at the bottom helps reduce light reflected from below.
If there are obstructions under the windowsill — radiators, AC line covers, etc. — account for them during measurement.
4. Wall Material
Before drilling, confirm whether the wall around the window is drywall, concrete, tile, or wood trim.
Different materials call for different anchor solutions, which directly affects long-term bracket stability. For tile walls, drill into the grout lines rather than the center of the tile to avoid cracking.
Outside Mount Blinds Installation Steps
The standard outside mount procedure for most SmartWings roller and cellular shades. For full motorized feature details, see the motorized window shade features guide:
Mark bracket positions. Lightly pencil-mark the bracket fixing points from your measurements. Use a spirit level to confirm both sides are aligned before drilling — those extra two minutes save you from fixing a tilted shade later.
Drill and anchor. Match drill bit and anchors to the wall material — drywall takes toggle bolts, concrete needs a hammer drill with expansion screws, wood trim takes direct screws. Keep drill depth slightly above anchor length.
Secure the brackets. Align the brackets and tighten the screws, then cross-check horizontally with the spirit level once more to confirm both sides are on the same plane.
Mount the shade. Snap the roller headrail or cellular shade top rail into the bracket slots; once you hear the locking sound, give it a gentle tug to confirm the shade won't detach.
Test operation. Use the remote to run the shade up and down to confirm the upper and lower limits are set correctly. If both limits hold, the travel is good. If fine-tuning is needed, refer to the manual to adjust.

Shade Types Best Suited for Outside Mount
How well outside mount works depends largely on the structural characteristics of the shade itself.
Three product types tend to deliver the most reliable outside mount results.
1. Blackout Roller Shades
Best for: Bedrooms, home theaters, nurseries, media rooms — blackout-priority spaces Starting price: $159.99 (Vinyl model) Range: 7 fabric options.
With blackout fabrics, the shade extends beyond the window frame when outside mounted, noticeably improving the side light bleed that inside mount struggles with.
For a detailed comparison, see the 12 types of roller blinds guide.
2. Cellular Shades
Best for: West-facing windows, rooms with strong insulation needs, older homes with cold winters and hot summers Starting price: $179 Range: Single Cell and Double Cell for different insulation levels.
The honeycomb structure provides insulation, and outside mount covers the cold-bridge area around the window frame as well, helping with winter drafts and summer heat gain.
Note: cellular shades aren't ideal for very narrow windows like sidelights — for those, roller shades are the better fit.

3. Outdoor Shades
Best for: Patios, balconies, porches, outdoor dining areas Features: Fabrics treated for UV resistance and weather durability
If "outside" in outside mount refers to a truly outdoor setting, indoor shades won't hold up well — outdoor shades handle sun and rain exposure better.
For detailed selection, see the outdoor patio shades buying guide.
SmartWings' main product lines support custom sizing — if your window's outer dimensions exceed the standard website ranges, contact customer service for a custom quote.

Common Outside Mount Installation Issues and How to Avoid Them
Most outside mount problems cluster around a handful of details.
Noticing them in advance is usually enough to avoid them:
1. Brackets Set Too Low
The most common mistake. When brackets sit flush with the top of the frame, the closed shade may still leave a thin gap at the top.
Raise the bracket position slightly so the shade extends above the frame top when fully closed.
2. Ignoring the Window's Opening Direction
Another frequent oversight — finishing installation only to find an inswing window can't open.
Simulate the window's open-close motion before installation, and confirm the fully raised shade doesn't conflict with any moving parts.
3. Underestimating Wall Load
The shade, motor, and battery weight need to be supported jointly by the brackets and the wall. Drywall without proper anchors can sag or detach over time.
Always match anchor type to wall material.
4. No Plan for Power or Battery Routing
SmartWings battery models run on a 4–6 month charge cycle with 6–10 hours per full charge — think through how charging will work before installing.
For hardwired models, leave the wiring to a licensed electrician, and plan the routing during the renovation phase.
FAQ About Outside Mount Blinds
Q1: How much coverage allowance should I leave for outside mount installation?
The exact allowance depends on window size, wall space, and blackout needs, and recommended values vary slightly by product. Refer to the SmartWings official measurement guide or contact customer service to confirm.
Q2: Will outside mount damage the wall or window frame?
Under normal installation, outside mount only requires a few small-diameter holes in the wall or trim, which can be filled and restored with putty after removal — no damage to the window frame itself.
Q3: Which SmartWings products are best for outside mount?
Blackout roller shades offer the broadest fit, from $159.99, suitable for bedrooms, living rooms, and media rooms. Cellular shades are a better pick for insulation needs, and outdoor shades for patios or balconies.
Q4: Do motorized outside mount shades require pre-wired power?
Battery models don't need pre-wired power — periodic recharging is enough. Hardwired models connect at a wall junction box, and the routing should be planned during the renovation phase.
Q5: Are bathrooms and kitchens suitable for outside mount?
Humid environments don't affect the mounting method itself — what matters is fabric durability. For these spaces, prioritize water-resistant or easy-clean fabrics, and avoid standard cotton or linen materials.


